

Introduction
Within the AVD world, a lot of people use FSLogix for profile management as it is being pushed as the de facto profile management system for AVD. I mean it even comes pre-installed on the multi-session images now!
So, you’ve built your AVD environment, and you are using FSLogix for Profile containers (and potentially ODFC) and you want to know the options for High Availability and DR in order to protect the user data and provide availability in the event of a regional issue, etc.
A lot of people will generally only have a single file repo (be it Azure NetApp, Azure File Share, Windows File Share, etc) so if that storage account was inaccessible, users would lose access to their profiles. Less than ideal for any company.
Some people may have 2 storage accounts in different regions and in the event of a failure of one repository would switch over to using the secondary location. This could be handled by multiple entries in the VHDLocations settings of FSLogix.
This idea does provide profile access, however, has issues in that you are not replicating user data but recreating it in the event of an issue.
So, the question is how do we provide real HA and DR to the User Profile layer?
Enter Cloud Cache!
The good news is FSLogix natively provides this functionality in the form of FSLogix Cloud Cache
Cloud cache is used to provide resiliency and high availability to profile containers and ODFC. It is designed to protect users against short-term or intermittent storage issues.
Cloud Cache works by storing data across a number of storage locations. Users provide a list of locations based on proximity and preference.
The FSLogix service will attempt to access the storage locations in the order they are configured and one location will then be used for all read operations. Data will be written to all storage locations regardless of proximity.
Normal Usage (Single Location)
In standard usage of FSLogix, you can specify the number of storage locations under the VHDLocations option of either Profile or Office Containers.
This just tells FSLogix to be aware of several storage locations where the profile could be stored in. It will not provide any HA or replication. The FSLogix service will simply check each location to see if it has access, and if a profile exists or not.
So, if the user does not have permission over the first VHDLocation in the list it will move on to the next, and so on.
This process is okay to split out profiles to different storage locations or to provide a hard failover to another storage location in event of a failover, but it will not provide HA or any real DR of the data.
Cloud Cache (Multiple Locations)
This is where Cloud Cache comes in. You can set the CCDLocations setting for the Profile or ODFC to 2 or more storage locations.
NB: In order to use Cloud Cache, you must also remove the VHDLocations setting.
Once you have configured this setting, it changes how the FSLogix service deals with copying data to the virtual disk files.
When using the standard VHDLocations setting data is copied to the virtual disk file as it is written within the OS. This means the disk is up-to-date immediately, but the data is only copied to a single VHDlocation. This will be the first location in the list that it had access over.
When the CCDLocations setting is used, data is written to a defined Cache location on the Session Host first, then the FSLogix service will periodically copy this data to all storage locations referenced in the settings.
The service will also perform a copy on logoff to ensure data to all locations is up to date.
This means the data is distributed across multiple storage locations creating data that can be used for HA means.
Example
In the following example, I have an AVD environment in North Europe.
I am using FSLogix for Profile Containers and have a primary storage account in North Europe providing an FSLogixProfile file share.
I also have a secondary DR storage account in West Europe with an FSLogixProfile file share.

In the example when a user connects to the AVD session host, the FSLogix service will create the profile and cache the details locally on the Session Host.
The service will then perform periodic data writes to the Storage Locations.
It will also perform a sync task on log-off to ensure all storage locations have up-to-date data.
Configuration
So now we know how Cloud Cache works let’s get testing it!
I am going to assume that you already have an AVD environment configured with a single FSLogix storage location using VHDLocations.
Storage Account
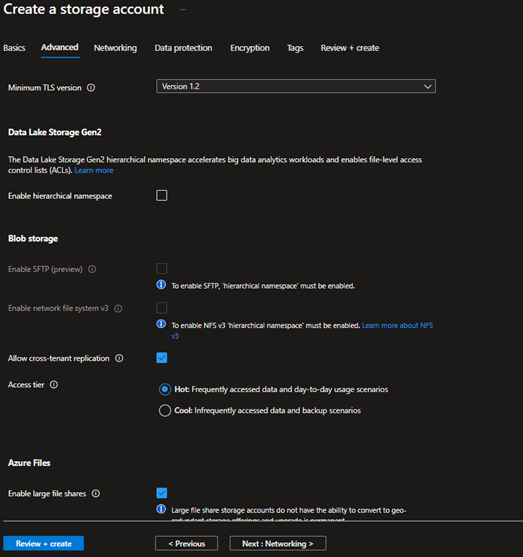
First things first we will need to create a new Storage Account to host the File Share for our secondary ‘DR’ storage location.
Configure with your required settings (SKU, Location, Name, etc)
In my case, I am creating this Storage Account in East US just for testing.
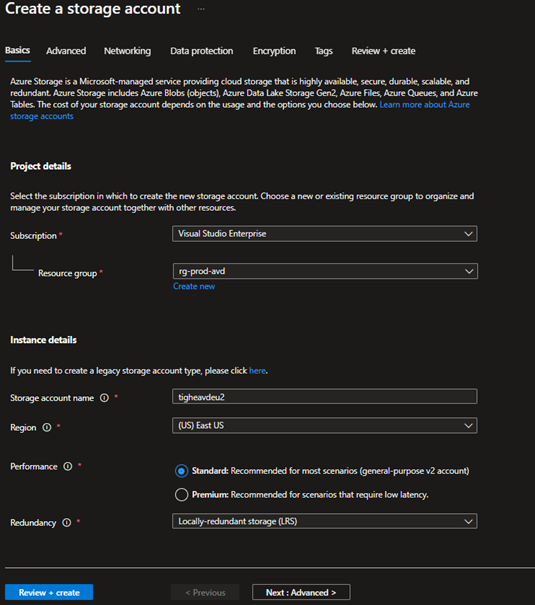
There are no specific requirements on the Storage Account so again select the correct settings for your organization then click Review + create
Check the settings and if all is good click Create
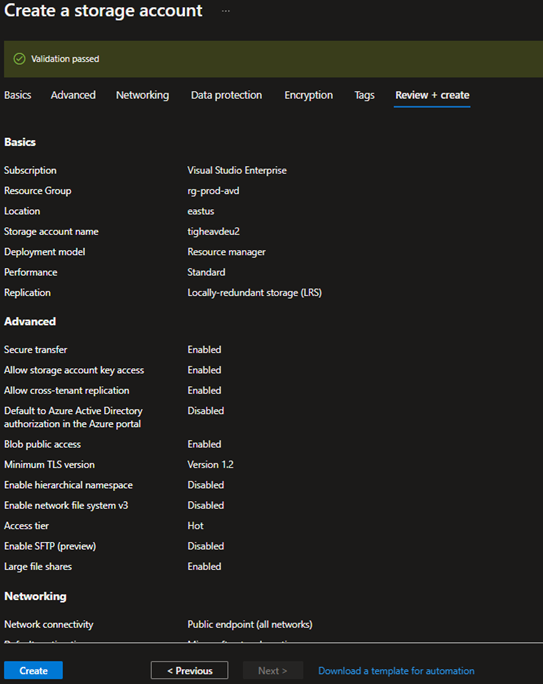
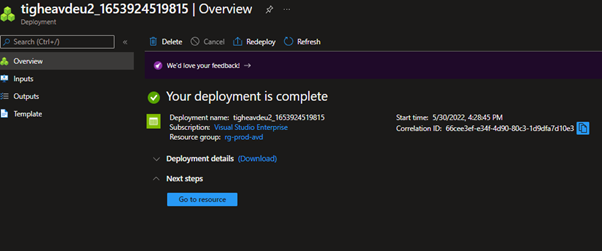
The Storage Account should then deploy.
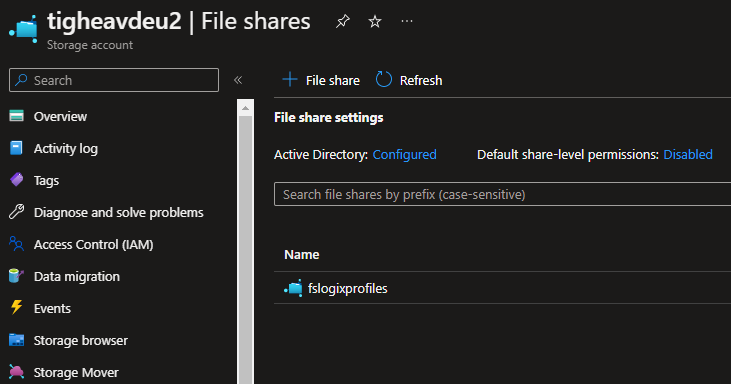
Now create a share to house your profile container disks. In my case, I created a share called fslogixprofiles
Join Storage Account to AD
We need to make sure the Storage Account is Joined to Active Directory so the relevant access permissions can be set on the file share.
We need to download the AzFilesHybrid module and
Enable AD DS authentication to Azure file shares | Microsoft Docs
Once downloaded run the following to import the AzFilesHybrid module.
Import-Module .\AzFilesHybrid.psd1

In order to run the commands, you may need to temporarily change the Execution Policy to allow the AzFilesHybrid script to run.
Set-ExecutionPolicy -ExecutionPolicy Unrestricted -Scope Process

Next, we need to connect to our Azure Account. Enter the following:
Connect-AzAccount
When prompted log in with a suitable Administrator account.
We now need to select the relevant subscription that is holding our new DR storage account. Run the below substituting the Subscription name as needed.
Get-AzSubscription -SubscriptionName “Visual Studio Enterprise” | Select-AzSubscription
We can now run the script to join the storage account to Active Directory. In the below substitute as required.
Join-AzStorageAccount -ResourceGroupName “rg-prod-avd” -StorageAccountName “tigheavdeu2” -DomainAccountType ComputerAccount -OrganizationalUnitDistinguishedName “OU=NoPasswordExpiry,OU=Users,OU=TigheTec,DC=TigheTec,DC=co,DC=uk” -EncryptionType AES256
NB: If using ComputerAccount for the DomainAccountType you will want to deploy into an AD OU that is excluded from the default password policy. This will remove the need to renew the computer account password every year.
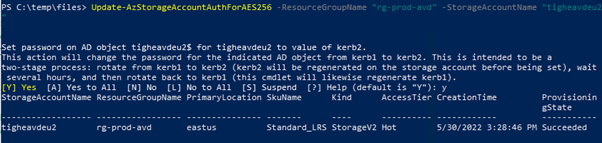
This is the recommended setup steps from Microsoft.

Update-AzStorageAccountAuthForAES256 -ResourceGroupName “rg-prod-avd” -StorageAccountName “tigheavdeu2”
FSLogix Configuration
I’m now going to configure Cloud Cache via GPO.
You should have already downloaded and installed the FSLogix Administrative Templates and installed them into your Central Store.
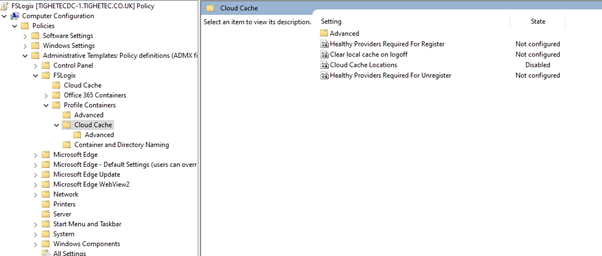

In my case, I have configured the 2 separate Azure File Shares as Cloud Cache locations.
You specify multiple locations by separating them with a semi-colon. As shown below:
type=smb,connectionString=\\tigheavdeu.file.core.windows.net\fslogixprofiles;type=smb,connectionString=\\tigheavdeu2.file.core.windows.net\fslogixprofiles
NB: Make sure you remove any existing VHDLOCATIONS configuration as you should either have VHDLOCATIONS or CCDLOCATIONS set, but not both.
Make sure all other settings are as you need for your AVD environment and then assign this GPO to the relevant OU.
Give the GPO time to apply (or force with GPUPDATE) and let’s get testing!
Testing
To test that Cloud Cache is working we just need to login to the AVD environment and then check that the virtual disks are creating in both the storage locations.
So, let’s start by logging in.
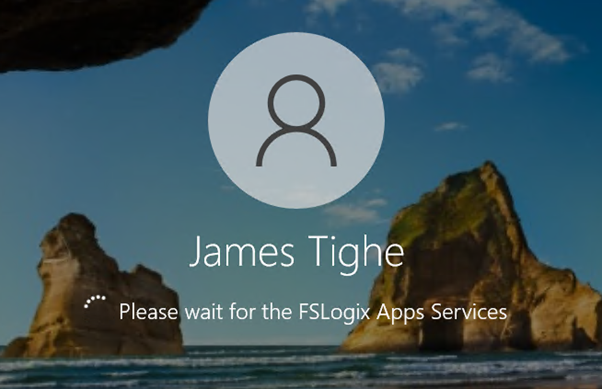
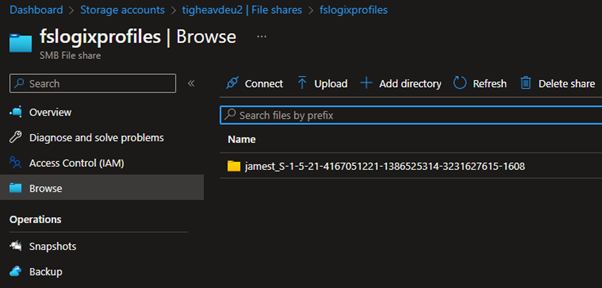
Once logged in we should see the profile data has been created on the primary Storage Location

And it will also show on the Secondary Storage location. This may not be immediate depending on the location of your secondary storage location.
And just like that you have configured FSLogix to write profile data to multiple locations and provide high availability of that data!
Caveats
Now it is important to make clear from the outset that Cloud Cache will not provide 100% protection against data loss, as there is a delay in writing data from the cache to the storage location.
Because the data is first written to cache storage on the Session Host before the FSLogix service replicates the data. So, there will be a small delay in this data being replicated to the various storage locations.
Also, we need to be aware of the network latency to the configured storage locations. If you have a secondary data center in a region that is situated a large distance from your primary site, then replication of data will be slower than if you are replicating to the same region or geo-partner region.
Log Off Impact
Another consideration worth mentioning is the effect Cloud Cache can have on the logoff performance of the session.
On first login, it is possible a large amount of data will be created (Outlook Profiles, etc) and due to the replication, it could take some time to create the initial virtual disks within the storage locations.
This can cause a slow logoff for the end user.
This can also happen anytime a large amount of data is created within the profile (or ODFC) as the FSLogix service will wait until replication to all CCDLocations is up to date before completing log-off.
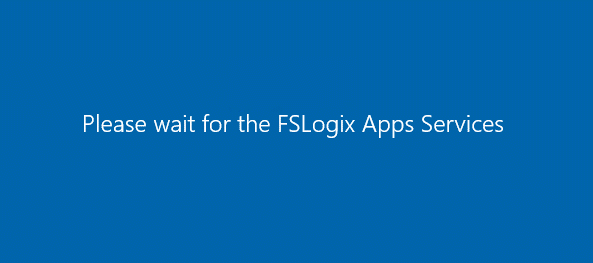
I tested by creating a profile and then downloading a large amount of data (Outlook profile, ISOs, etc). The profile disks did increase in size but it wasn’t until the log-off that the FSLogix service attempted to flush the current data writes to storage locations.
On logging off, I was presented with this screen for around 4 minutes!

2 thoughts on “FSLogix Cloud Cache for High Availability”